30 Floors Up is maybe one of the most complex Roblox games that’s popular right now. It’s got freedom of choice to a point that I feel the responsibility weighing on me whenever I play it. With so many choices, knowledge is power… and this is meant to provide you with as much knowledge is possible. I was not able to find a good 30 Floors Up guide out there that didn’t seem bare bones or… like it was from someone who’d played it for less than ten minutes. So I decided to make this one, the 30 Floors Up Roblox guide, with the aim to make the most comprehensive collection of info on the game around, and keep updating it until it had everything a survivor needs to know either in it, or linked from it. So, I hope you find this helpful.
30 Floors Up Roblox Guide – A Complete Guide For Survivors
The premise of 30 Floors Up is a pretty nightmarish one. You’re in your high rise apartment when the zombie apocalypse breaks out. Undead are roaming the streets, and your hallways. You need to either wait it out, or find a means to escape. How you proceed from there is up to you.
Daily Needs
Part of surviving 30 Floors Up is being able to manage your daily needs. There are three things you need to keep track of.
Hunger – Restored by eating food.Thirst – Restored by drinking water.Fatigue – Restored by sleeping.
You need to maintain all of these throughout, and this means keeping hold of supplies, and managing your time. You also need to keep yourself safe from zombies, which will wander the public areas and attack on sight. They will also try and break through doors and get inside homes if they’re able to work out there are survivors inside. If one reduces your health to zero, that’s the end of your story.
Once the items within your own apartment dwindle, you will need to begin making your way to other homes on your floor, and eventually other floors, to search for supplies. Eventually you may be able to find renewable solutions to a lot of the supply issues,
Items
Scavenging is key to survival in 30 Floors Up. You need to creep through the flats of the building, take what you need, and get back in one piece without getting eaten. This is a quick cheat sheet for scavenging, in terms of what items actually do, so you can decide whether they’re worth the inventory slots. Keep in mind, if you pick up one of the items marked ‘Two-Handed’, then you can’t pick up anything else.
Bandage
Used to restore health.
Bat
Weapon, inferior to the Frying Pan.
Blanket
Used for constructing shelter roofs.Beds are colder with no blanket.
Board
Two-HandedUsed as Building Material, and to repair your door, along with screws and a hammer.
Bolt Cutters
Can be used to open the east gate.
Bottled Water
Provides 1L of clean water.
Candle
Provides a static light that lasts 15 minutes.
Cleaning Bucket
Holds 10L of water, can be used to collect rain.
Coiled Rope
Building material.
Flashlight
Provides a light source, must be held in one hand.
Frying Pan
Weapon
Hammer
Used to repair door with board and screws.
Head Torch
Hands-free light source. Has 120 minutes of light.
Kite
Maybe this could attract some attention?
Knife
Weapon, largely inferior to Frying Pan and Bat.
Lantern
Clips to belt for a hands-free light source. 90 minutes of light.
Metal Mesh
Building material.
Mobile Phone
Can be used as a noise maker by setting an alarm and dropping it on the floor. Zombies will move towards the phone. Be very careful not to set an alarm by accident. It will sometimes start ringing, potentially attracting zombies. This phone will progressively lose charge and eventually go dead.
Portable Stove
Two-HandedCan be used to boil water and cook.
Radio
Used for listening to broadcasts.Uses batteries.Can be turned up to use as a distraction.
Rags
Can be used to cover your mouth to avoid the effects of smoke inhalation.Can also be used to bat the bottom of furniture to allow you to move it quietly.
Screwdriver
Used to loosen vent covers to access the vents.
Screws
Needed to repair doors.Building material
Sealed Bottle
Provided two litres of clean water.
Sleeping Bag
Portable sleeping spot.
Tinned Food
Contains two portions of food.Requires a can opener to eat.
Toolbox
Two HandedCan be used to carry several tools at once.Useful for repairs.
Wrench
Used to loosen heavy vent cover.
Note: The day-by-day rundown is still being active updated as we explore more choices. 30 Floors Up is a game with an awful lot of player freedom, so we’re trying to give you a rundown of the timeline and the choices available to you, so you can make your own decisions about how you want to advance, while helping you get set up in the best possible way.
Day 0
The first evening doesn’t really count as the first day, that only kicks off on the first full day. You’ll return home to apartment 3004, on the 30th floor of your apartment block. It seems like a pretty normal evening… until you notice a disturbing news report. Interact with the TV to hear a rather concerning news broadcast. From here, this evening is pretty set in stone. You can’t leave the apartment, and time will pass fairly slowly, so make the most of it. Here are the objectives you’ll be asked to complete:
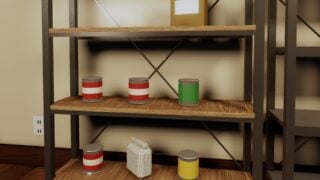
Gather water. You’ll need to get the bucket hidden under the sink. (Or the one in the bathroom.) Then, you’ll need to fill it up with water from the sink or bath, and take it to your water rack. (That’s the metal shelf unit next to your balcony door, in case you’re confused. This is also good time to fill your other buckets, jerry can, and bath tub.Gather food. You’ll need to find food around your apartment and place in on the pantry shelf. Check cupboards for tins, and your fridge for leftovers. You don’t need to gather everything, you just need enough to meet the objective.Check the door. At some point you’ll be asked to check the door, and you’ll be informed that there’s someone outside.
Daniel
Daniel is the NPC who comes knocking on your door. His door is broken and zombies are threatening to break into the corridor. You can choose to let him in, help him with his door, or tell him you can’t help. If you choose to help him fix the door, you will be able to enter the corridor. The door needs a screwdriver and some screws to fix, which you’ll find in the toolbox in your utility room. As far as we’re aware, letting him in is the only situation where he will survive long term (he will eventually die on his own) so that’s up to your conscience. The game says Daniel will share rations if he’s staying with you, though I wasn’t able to find any evidence that you need more food if he’s there.
Day 1
Day 1 is where you first get your freedom. It’s also a big time crunch. If you want to get anything done in the hallway while still saying reasonably safe, you need to do it on Day 1.
There is only one major objective the game tells you that day, and that’s to decide your ration amounts. You can adjust these on the fly, however. Full rations will consume more, but will keep your stats. The reduced options will gradually degrade your stamina, limiting how well you can run and fight.
The Okafors
One of the major events of Day 1, is that Ruth and Ben Okafor, who live across from you, decide to make a run for it. You can find their door open, and the two getting ready from the start of the day.
Regardless of what you do, they will leave at 4pm.
If you talk to Ruth, she will ask for help moving a blue bag. If you do this, she will offer your a key to the janitor’s closet. This can come in very useful later on.
Speaking of keys, once the Okafors depart, you can pick up the Emergency Cupboard key in their apartment. This opens the Emergency Cupboard in Apartment 3002. You can also pick up an old mobile phone, food, water, and an old kite on a string.
Zombies
Shortly after the Okarfors depart, you’ll get the first instances of zombies actively wandering the hallways. They’re generally few in number on this day, but will increase in number as the days go on. Anything you want to do in the corridor, you should try and get it done on Day 1 for the easiest time of it.
Elevator Shaft
Once the elevators stop, you can use the Elevator Key, from either the Janitor’s Closet, or your own toolbox, to open up the other elevator shaft. This allows you to access the roof, which may be crucial for your survival.
Day 2
Day 2 is when things start getting noticeably more serious. The zombie problem increases, and infrastructure begins to break down.
Power And Water
At the end of Day 2, you will lose both electricity and water mains. This means you won’t be able to refill from the kitchen sink or the bath, and if you want any more water you’ll need to scavenge or collect it. Here are a few things you should do before the end of the day to make sure you have plenty set aside.
Fill up both cleaning buckets in your apartment. There’s one under the sink, and one in the bathroom.Fill up the large jerry can. You can’t fill it directly from the tap, but you can pour cleaning buckets into it and refill them.Fill up the bathtub. Put the plug in in the bath tub and fill it up with water. This holds 60L, which is enough for quite a while. You can scoop it out with buckets.
You’ll also lose power, which means that your apartment will be dark most of the time. You should have been able to snag a lantern from 3001, this is pretty useful in terms of helping you see. Lanterns have limited power, so don’t be too careless with it, but one with decent charge gets about 90 minutes of light, so you have a lot of leeway.
Mara
Around Day 2 you’ll also hear some knocking on the pipe outside. If you go out there you’ll find Mara, your elderly neighbour, who is stranded in her house. She asks you for some food, and offers a radio in return. This is a useful trade, as a radio provides information, as well as a potential noise distraction. She’ll also give you a pack of spare batteries on top of that. Whether you agree to the trade or not, Mara won’t be around too long. After giving her the food and getting the radio, she jams her balcony door shut, so the horde can’t get through… but she can’t escape either. If you are able to open the hatch to the roof and the corridor gate, Mara will be able to escape up onto the roof.
The Attack
Day 2 gives you your first zombie attack. Wonderful. (This may sometimes happen on Day 3, but it’s around this time.) Zombies will start to congregate around your front door and try to break it down. You’ll need to drag furniture to the door to brace it. This is kind of a finnicky system, and sometimes seems to bug out. Sometimes furniture can get stuck and become non-interactable, though this does make your doorway impassable for zombies… and pretty tough for you to pass through too. If everything goes normally, you should be able to drag your couch over and brace it against the door. Make sure to re-brace it if they’re able to push it away.
If the zombies break through, you will need to fight them off. Once you do, you can repair the door with a board, screws, and a hammer.
Day 3
Day 3 is your first day with no power, and it’ll carry on this way for the rest of the game. Your apartment will be dark without a light source, but there are a few way to make things easier for yourself.
Get hold of a hands-free light source. 3001 has a lantern inside. If you didn’t get that on Day 1, you have a chance to get one later.Store things on the balcony. Losing items in the dark is a genuine problem here. At least outside you can enjoy reliable daylight. Mara has also made sure the balcony is relatively safe. (RIP possibly.)
Day 4
This is a quiet day. The game will suggest you start investigating your house and surroundings. It will also urge you to investigate Room 3002, which is accessed throw the air vent in your bathroom. If you have a wrench at this point, you can also access Mara’s apartment, and the one next to it. (Though this one has a drop, so it’s tricky to re-enter the vent, so be careful.)
Day 5
On this day, the game will suggest you loot the Emergency Cupboard in 3002, if you haven’t already.
Day 6
This is generally the day that the metal gate will finally break, if you haven’t cut the chain with the bolt cutters. The upside is the corridor is easier to navigate and you can easily enter the stairwell. Downside? More zombies.
Day 10
Begins ‘A Quieter Week’. (Spoiler, it won’t be that quiet.) Keep barricading your doors.
Bandits
Around this time, bandits may starts breaking into your apartment and stealing supplies. You may have to physically fight them to get them to leave your stuff alone.
Day 11
A new complication arrives on Day 11.
Smoke Over The River
With few people left alive and infrastructure gone, fires are raging out of control. The air is full of smoke. Make sure to close your balcony doors when it’s windy.
Day 12
Structures continue to fail under the weight of the undead onslaught.
Something Gave Way
The East Fire Door will jam open and a new surge of zombies will get in. You’ll need to take a hammer to it to close it, a dangerous activity. A distraction is a good idea.
Specific Task Guides
Rather than repeat ourselves with guides that cover certain tasks and actions in 30 Floors Up, this section will link to smaller guides on how to complete them. We’ve listed ones that already exist, and ones that are currently under construction. (I’m covering these solo right now, so do appreciate the patience.)
How To Purify WaterHow To Open The Emergency CupboardHow To Open The Latched ToolboxHow To Access The Roof (Under Construction)
The 30 Floors Up Roblox guide will continue to receive more work as I continue to gather more information.
Planned Sections
Here are some content still under construction. Updates due soon!
EndingsClassesNPCsEvents beyond Day 15.
The post 30 Floors Up Roblox Guide – A Complete Guide For Survivors appeared first on Gamezebo.
No responses yet