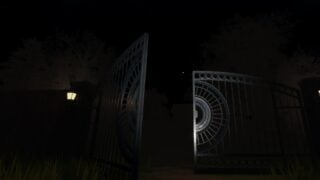
We can always appreciate a good straightforward horror game at GZ, and finding The Black Bell was a nice surprise. Much like our enduring favourite Mulberry County, it’s a fun linear horror experience. In this case, you need to rob a very creepy house and find a bell… no, a pearl. Definitely a pearl and not a bell. Finding the bell would be a very bad idea. To help you navigate some of the puzzles, and be ready for the scares, this The Black Bell walkthrough details every step you need to progress so it’s handy to have on hand in case you get stuck… or just want to know what will happen if you go read the note under the creepy flickering light.
The Black Bell Walkthrough
So in this walkthrough I’ll be going over each of the objectives as they appear when playing through the game, and explaining each of them in turn. I’ll also add screenshots where it seems necessary. I’ll also usually make come indication of where scares are coming, but I usually won’t describe them in detail as I don’t want to ruin the… fun? I will try and indicate if the spooky thing is harmless or whether it’ll try to get you though, for your own safety.
Chapter One
This one kicks the story off with what sounds like a simple job, as a lot of horror media does.
Reach The House
You’ll start out on a lonely forest road. To the left of the car, a dirt track goes off into the woods. You’ll need to follow that. As you do, a voice speaks to you on the radio and tells you your objective. You need to find a black pearl somewhere in the house. It also warns you of a black bell you mustn’t touch under any circumstances. I’m sure it’s nothing to worry about.
Try The Front Door
You should see the large house in front of you. Walk up to it, step onto the porch, and interact with the door to find it locked.
Find The Key
You’ll find the key on the porch to the left of the door. Interact with it to pick it up.
Restore The Power
Once you get inside, your contact tells you to find the breaker box to restore power to the dark and creepy house, while warning you not to wander too far. You can find the breaker box in the basement (of course) which is underneath the staircase, the first door on your right.When you head down the steps you’ll probably realize you might not be quite alone in the house, as something is peeking at you round a corner . (Because it’s a horror game and it’s a basement.) Fortunately, it won’t do you any harm. At the bottom of the stairs, turn right and head along the hall there to reach the room with the breaker. When you interact with it, you’ll find it needs a fuse.Go back upstairs, and turn right, heading down the hall. Try not to feel too worried by the creepy mannequin to your right.At the end of the hall, turn right into the study, then right again into what appears to be a bedroom, with a projector turned on, facing the wall. The fuse should be on the bedside table.One you have it, head back towards the basement, and prepare for a surprise in the hall… though you might have seen it coming.Head back to the basement and interact with the breaker box to restart the power.
Find The Old Office
With the lights back on, your mysterious benefactor tells you to start looking for this pearl. He tells you to take a look in the old office, which is upstairs. So, off we go. The lights are now on, but everything is pretty gloomy.
You can find the attic upstairs, go through the door on the left, and then turn left again and follow the hallway.Search The Old OfficeYou’re instructed to take a look around the office. Behind an armchair there, you’ll find a lever. Pull the level and the back wall will slide away, revealing a secret room.There is a case on a stand there. That must be the pearl, right? Easy…right?Sadly, the pearl appears to be missing from its case. Underneath the empty case, you’ll find a note.
Read The Note
The note reads:
“The Pearl is no longer safe in this room.
I have moved it closer to heaven, where the house cannot reach it.”
While you’re focused reading, another harmless scare. Don’t peer too close to your screen.
Your contact speaks to you, and suspects it might be up on the next floor.
Find A Way Up
For this objective, head back to the top of the stairs and try the attic door there. You’ll find that it’s locked.
Your contact suggests you might find a key in the Piano Room.
Search The Piano Room
What would a spooky house be without mannequins?
You can find the Piano Room down the right-hand route down the hall you turned left on to get to the office. Walk along that way, and take the first door on the left, at the first corner.Be ready for a bit of a surprise when you enter. Nothing dangerous though.You’ll find a room full of mannequins, a lens on a stand, and a concerning bit of instruction: ‘They watch. Do not let them watch.’ Okay, we won’t.While it sounds like some kind of threat, the sign explains how to complete this puzzle. You need to turn all the mannequins so they’re facing away from the piano. It should look like the screenshot above. If you’ve done it right, there should be a loud thud.
Check The House
Yeah, I’m not searching in there.
This instruction comes with no prompting, and a counter, which is a little alarming to start with. It’s actually pretty easy. You just need to walk into six different rooms around the house. I’d recommend some of the downstairs ones as there’s less creepy nonsense going on… though be careful of the ensuite downstairs. Nothing will hurt you but someone is up to mischief there.
Optional: The Note
If you keep straight out of the door to the end of the hall and and turn left, you should see a length of hallway and a table under a creepy flickering light. If you go down there before the piano room puzzle, the table isn’t there. On it is a note.
It reads: BEHIND YOU.
Great.
Turn to look behind you and. Huh. Nothing there. Look back for the table and… dammit, got me again.
Return To The Piano Room
After wandering around the house for a bit, go back to the Piano Room. The attic key is sitting on the piano. Er… thanks… mannequins? The especially lively one seems to have gone again.
Unlock The Attic Door
Go over and try the key on the attic door. It works! However, the hatch is too far to reach from the floor, so you’ll need a ladder.
Find A Ladder
Head down to the basement, and take the left-hand path this time to the laundry room. You should find a ladder up against the wall there.Pick it up and head for the stairs and… oh dear you’ve got company.Head towards it and brace for jumpscare.Go back to the attic door and place the ladder, then head up it to enter the attic. (Nothing bad could possibly happen in the attic of a haunted house, right?)
FIND THE BLACK BELL
As you make it into the attic, your contact speaks to you, and tells you there is a hidden room in the attic. He tells you to find it, go into the secret room beyond, and take the black bell… wait, what?
You can open the secret room by pulling the highlighted book in the shelf at one end of the attic. Doing so reveals a secret room, with two plinths, one with a pearl, the other with a bell.Reach for the pearl and… wait that’s not the pearl.Once you’ve done this, and determined something is messing with your radio, run for the stairs and through the front door to…. not the outside. Keep running anyway until you reach another door and the end dialogue plays. After that, you should get the prompt to open it.That’s all for Chapter One!
Chapter Two
Onto the second part of our The Black Bell walkthrough. As Chapter Two kicks off, you will find yourself in a strange, red corridor, just the other side of the door from where you finished Chapter One.
Follow the hallway around the corner, and your contact will speak up. The one you’ve increasingly got every reason to distrust.
Search For An Exit
Head through the door to find yourself in a place to looks like the house, but… not quite right. The furniture doesn’t seem to obey the laws of physics. Still, follow the hallway to the end. It’s pretty safe.Once you get to the far end of the weird floating bathroom, you should find a small gap you can interact to crawl into.In the crawlspace, take the first right turn and follow the path along. Despite this looking like a setup for a scare, you should be able to get out unbothered.You should come out into a long hallway full of floating objects.Follow the corridor to the end and watch out for the mannequin.Go through the door and you’ll find another long hallway.Walk to the end and open the door to find a brick wall.Turn around and head back to the door you came in from to find… another brick wall.You will need to go back and forth a few times to advance, and you will find a few scares on turning around, so be warned.
Eventually, the end of the corridor opens to a creepy staircase down.
Find The Missing Parts
On following the stairs down you’ll walk into a room with a low ceiling, and a large shutter.
Your contact tells you need to open the gate to go further down. (?) He tells you you need to find a wheel and a lever in the area. Well, the door is locked behind you, so you may as well.
First, you need to go the machine next to the shutter and interact to examine it. (You won’t be able to pick up the parts unless you’ve done this.)
Next, you need to find the two parts:
The Wheel
The wheel is down the left-hand path, in the following location:
At the first junction, turn leftAt the second, turn rightFollow the path around a corner that turns left.Walk forward until you hit a wall, and then take the last left passage.Turn right around the corner, and you should see the wheel on the ground.Pick it up and return to the main room to see… something going down the other passageway. Wonderful.
The Lever
Down the right-hand path you’ll find the lever, if you follow the directions below.
Turn left and follow the passage.Take the right turn at the junction.Almost immediately you should see another split. Take the right-hand one, the one with the ceiling light.At the end of that hall, turn left.Take the first right turn, and you should see the lever at the end of the hallway.Once you have the lever, retrace your steps and… you might have company.
Once you have the parts, you can interact with the machine to place them, then use it to open the shutter. Inside is a hole, and the words ‘LEAVE THE PEARL’. Huh.
Interact with the winch to go down the whole. (Half expected to get sparta kicked in by a skinwalker, to be honest.)
Drain The Water
Gregory’s house.
You find yourself in what your contact refers to as ‘The Lower Tunnels’ a place full of pipes and water. You contact also helpfully informs you that there’s some monster down there that hunts by sound and not to try to outrun it. Cool. Wish he’d mentioned that before sending you into an evil sewer.
You need to find four valves to drain the water.
The first is easy enough, one you exit the pipe and look down the hallway, it’s straight ahead of you, on the right-hand pillar. Interact with that to turn it. Nothing bad should happen.
Following the corridor will lead you to a large drop. You’ll find the monster roaming around below.
The monster, (who I named Gregory after spending too long trying to avoid him) roams around the passages below, more or less at random. You can tell Gregory is coming by his snorting and snuffling getting closer.
Gregory appears to be attracted to noise. The noise of running, and the noise of turning valves.
If Gregory is coming, or is chasing you, you can avoid him by jumping into the lockers against the walls.
There are two valves along the right hand passage, one at the back of the room, and one far to the left. (The easiest way I found to get that one is to move along the central path and turn left up there, as the valve is in the far back corner of the map.)
If Gregory catches you, he’ll give you a jumpscare, but you’ll spawn back up in the corridor you came from, and you get to keep any valves you turned, so you won’t lose much progress.
Once you have all the salves, the water should drain, and you should see another crawlspace up against the back wall. Interact to crawl in… Gregory might appear to say goodbye.
Keep crawling and drop down, then push the vent away to find yourself… in the house again? Oh bother.
Search The House
Well, looks like you’re back in the spooky house again, and your contact is being weird and cryptic, so time to start looking for an out by any means necessary.
Head down to find yourself in what appears to be the upstairs landing, but most of the upstairs appears to be bricked off. Downstairs it is, then.Head downstairs and you might see things looking a bit disordered, but a lot like the original house.Interact with the highlighted objects to search them. You can shake a lot of them around, but what you need is in the small study area next to the bedroom, in the large board next to the taxidermied eagle, a key and a photo which reveals something about your contact.
Escape The House
You’re not fooling me, game.
With the key, head to the kitchen, and to the locked door there. It will lead you to another spooky stairway.Head down. (How far down are we, at this point?)Ahead, you can see… what looks like the outside, and your pickup truck. Looks way too easy, right?You got that right.You’ll wake up in another weird corridor of floating furniture. Your contact or Arthur, I guess, is being shifty again and telling you to get the pearl, something a lot of writing on the walls has been warning against.Follow the weird hall to the end and you’ll see an enormous door.Walk up to the door, and interact with the seal.
Silence The Bells
On touching the seal you’ll find yourself in a circle surrounded by bells. Gregory is also here apparently. Hi Gregory.
This is a test of reaction time. Eight bells in the circle around you will ring at random intervals. You need to go to that bell and interact with it to stop it ringing. If it’s allowed to finish, Gregory will get into the circle. I’d recommend after silencing one bell, that you move back to the center, in case the next one that rings it on the other side. You don’t have a ton of time to get to it.
Once you’ve stopped eight bells, you’ll have broken the seal. Which is… good?
Getting The Good Ending
The door will open, and you’ll find a large room. At the back, you’ll be faced with a choice. You can take the pearl, on the left, or you can leave through the gap in the floor on the right.
Given Arthur’s history, running for it seems like a good call.
Head through the gap in the floor on the right, ignore Arthur, and climb up the ladder to find your truck.You drive away from the house, hopefully forever.Hi Gregory.
That’s everything you need for The Black Bell! I hope this had been helpful.
The post The Black Bell Walkthrough – Chapter One And Chapter Two appeared first on Gamezebo.
No responses yet