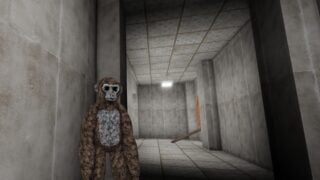
So we’ve been monkeying around in Roblox’s simian survival horror Ear Game lately, and getting lost in the low res corridors full of chainsaw apes. If you don’t want to find yourself cornered, or are just wondering where that last stupid keycard is, you’re in luck. This Ear Game walkthrough should set you on the right track.
Roblox Ear Game Walkthrough
Let’s get into the game itself.
Objective
In Ear Game, you are an ape descending into the Ape Storage facility, and there appear to be some pretty irregular apes in residence. In Ear Game your objective is to advance through the facility, finding keycards to unlock new areas. Just after the entrance is a shop and lobby area. This is your safe room, and you can trade for items, or put on hats. Once you head down the pipe from here, you’ll end up in the facility proper, and things get a lot more dangerous.
Explore each zone, find scrap to trade in for gear, find the keycards to reach new zones, avoid apes with chainsaws for hands. Simple enough, right?
Scavenging
One of the major objectives you need to succeed in Ear Game is acquiring Scrap. Scrap equals money, money equals items, and items equals more chance of surviving getting jumped by a monkey with chainsaws for hands. You can find metal objects scattered around throughout the facility. Interact with them to pick them up. Take them to a Scrap Recycler machine and interact with it. This will give you credits that you can spend in the vending machine in the base area.
Different parts will give you a different amount of credits.
Screw – 1 CreditPipe – 2 CreditsBox – 2 CreditsGear – 7 CreditsCleaner – 1 Credit
In short, prioritize Gears.
If one of the killer apes catches you, you will lose all the scrap items you’re carrying, but you will keep your credits, so you should sell stuff ASAP.
Warning! Changing your hat will reset your credits. I learned this the hard way.
Items
There are a number of items you can purchase in the Shop in the lobby area that might come in handy.
Radar – 50 Credits
When held this highlights all hostile entities. You can see them through walls, and even pick up on ones on different floors. Objectively the best use of your money.
Molotov – 25 Credits
Holds up an enemy for a short time, sets the ground on fire.
Grenade – 15 Credits
Holds up an enemy for a short time.
Areas
Okay, let’s get onto the different areas available in-game. Most of them are locked off when you first start.
Level 1
This is the area immediately outside the lobby. It’s haunted by the Chainsaw Hands ape. You don’t need a keycard to access most of it, though Storage is locked behind a door you’ll need a Keycard from Level 2 for.
Level 2 – Parking Garage
You can open with with a keycard found in Level 1. This consists of two areas, and irradiated debris pile with a lot of scrap around, and the Parking Garage, accessed by rope. Slender patrols the Parking Garage, avoiding staying in the open for too long.
Level 3
Accessed through a door in Level 2, though you’ll need a Keycard from Storage to enter. This is the domain of the legless ape monster, so don’t forget to check the floor. There’s a lot of good scrap here if you’re brave e ough.
Level 4
This is accessible from the start by powering up the Level 4 door, found through the door with the blue stain on the floor in Level 1. This level is lit green, with large pits in the floor. Claw lurks around here. The pits are an instakill, so try not to panic during chases and fall in.
Enemies
You’ll run into several different money-adjacent enemies, each with its own irregularities. For the most part you should do your best just to avoid these guys completely (which is what makes the Radar so good), but if you’re in a difficult situation, it’s good to have a Grenade or Molotov on hand as a Plan B. Each evil monkey patrols a certain area, and won’t leave the area even if aggroed, so a sure-fire way to get away is to just book it for the sector exit.
Chainsaw Hands
A white ape that’s had its hands replaced with chainsaws. Angry at never being able to hold a sandwich again, it will chase after you if it sees you. One strike from this enemy is an instant kill, so beware. The easiest way to handle this guy is to avoid him completely.
Tall Ape/Slender
This extremely tall ape haunts the Parking Garage on Level 2. Long stride but too tall to fit through doorways, so use that to your advantage.
Claw
This ape is missing his hands… but that doesn’t mean he’s armless. If he catches you he’ll jab you with the remaining spike until you’re past caring. This this haunts Level 4 and is pretty alert to intruders. A Radar is highly recommended.
Crawly
This ape has no legs, but can still get quite a speed up. You’ll find him in Level 3.
Progression
So now the final, and most crucial part of the Ear Game walkthrough. You know most of what you need to deal with in Ape Storage, time to condense it all down into a fast track progression guide. These are the minimal steps you need to follow to reach all of the areas. Keep in mind this doesn’t account for trips to cash in your Scrap, and detours you might need to make to avoid enemies. Those are up to you.
Begin Ear Game, and head into the Ape Storage.Climb the rope, jump down, and enter the lobby area.Head through the lobby into the rusty pipe to enter the facility proper.Take a left turn at the first Scrap Recycler.Turn right, left and another left to find the room with the Level 2 Keycard.Head to the Level 2 door and interact with the card reader to open the door to Level 2.Turn left just past the door and climb the rope to reach the Parking Garage.The Storage Keycard is on the floor resting against two pipes in a corridor at the opposite end of the blue area.Head back to Level 1 and take the opposite path at the first Scrap Recycler from the lobby to reach the Storage door. Scan the Storage Keycard to enter.Cross the gap on the right. Follow the corridor along. The Level 3 Keycard is on the floor in the righthand room at the end of the hall.Head back to the Parking Garage on Level 2 and take the first corridor on the right from the big blue-lit area to find the Level 3 door. Scan the Level 3 Keycard to open it.You can explore Level 3 freely, though there are no progression items there right now.Level 4 is accessible from the start of the game. You’ll find it a little way past the Level 2 Keycard room on Level 1. You just need to take the battery from the table there and place it in the machine next to the door. Simple.
Hopefully this Ear Game walkthrough has given you a better idea of how to move ahead. We’re eagerly anticipating more content for the game, so hopefully we’ll see more additions to the facility very soon. Watch this space. If you like my walkthroughs, I’ve also done one on Hell Rails: The Scary Train, and one on Unseen Liminality recently, so maybe give those a read too if you’re a fan of those titles.
The post Roblox Ear Game Walkthrough appeared first on Gamezebo.
No responses yet