Chapter 8: The Remote Execution is the final chapter of Portal: Revolution in which players must stop Stirling from reactivating GLaDOS. Stirling is using the Spire for the cause and players must stop/destroy it while overcoming all the challenges that Stirling puts up.
In this guide, we’ll go over how to complete Chapter 8: The Remote Execution in Portal: Revolution.
Chapter 8: The Remote Execution Walkthrough
The Spire is located on top of the facility for which players have to use the portals to reach and it is powered from four different control rooms. Each control room has a Red Button that players press to stop and destroy the Spire to complete the final chapter.
Reaching the Spire
Go along the linear path from the elevator as the final chapter starts to reach a room where Stirling will trap and try to kill you. Look to the right side as your robot companion appears and shoot a portal on the side of the companion and the other one on the white wall to get out of the room. Go along the metal staircase to reach beneath the Spire.
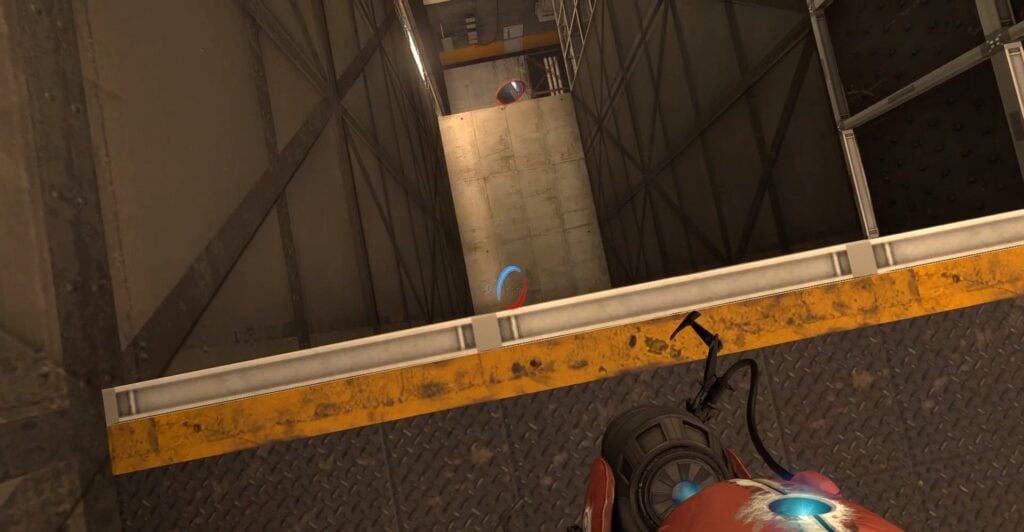
Look up to the railing beside the pipe, shoot a portal, and open another portal on the floor to go up. Now, shoot a portal on the wall beside the pipe and then jump down into the portal on the floor to cover the gap and reach the other side. Go inside the room and crouch down on the left side to see a broken vent. Shoot a portal through it and then open another portal to cross the vent.
There will be a giant fan in front of you through which you need to shoot a portal and then open another portal on the wall to cross the fan. Now, look up to see several floors above you and you need to start going up by aligning one portal next/close to the platform and another one on the floor. Jump through the portal on the floor to go up and you can even gain more momentum by going through the floor portal twice to cover gaps.
Once you have reached the top platform, go through the door on the left side to reach a room with a large pipe. Shoot a portal on the white wall above the door from where you entered and then go back to the platform and jump down on the floor to quickly open another portal to get across the gap. As you reach the other side, interact with the switch to close the door in the middle.
Now, open the portal on the door underneath the pipe opening and then go back to the platform to jump again. Doing it right will get you through the pipe and reach the Spire.
Control Room 1
You will directly come out in Control Room 1 where you will get to press the first Red Button. Simply wait for the conversation to end between the companion and Stirling and then put the companion on the claw to press the Red Button.
Pressing the Red Button in Control Room 1 will start a timer of 5 minutes and you need to press the remaining Red Buttons in each Control Room.
Control Room 2
Go through the opened door to reach a platform outside and find a block. Open the portal on the wall and then shoot another portal on the opposite side of the platform with a button. Go through the portal and place the block on the button to open a door beneath it. Move ahead on the platform and get on the pusher to get straight to the entrance of Control Room 2.
Enter the Control Room and deal with the turrets. Now, open a portal on the floor and another one on the wall, and then jump through it a couple of times to reach the railing with the Red Button. Press the Red Button and then go out of the Control Room.
Control Room 3
Open the portals to reach the starting platform and get the block. Use the portals to put the block on the button again and then use the pusher to reach another platform. Open a portal again to get the block and place it on the button to open the pipe above. A levitating force will discharge from the pipe and you need to open a portal on the floor and another one on the wall on the right side to fly to the entrance of Control Room 3.
Once inside Control Room 3, deal with the turrets and then open the portals to get on the railing to press the Red Button.
Control Room 4
Go outside of Control Room 3 and make your way back to the starting platform. Get the block and place it on the button to make your way back to the platform with the levitating force. Open the portals to fly through the levitating force and upon reaching the final platform, drop down from the force and open a portal to fly up to the top of the platform.
There will be a tilted wall on the top on which you need to open a portal and then jump down on the floor and open a portal to reach the entrance of Control Room 4. Enter the control room and deal with the turrets before going towards the button. Use the Portals to cover the gap reach and reach the Red Button.
Press the final Red Button to stop the Spire and it will eventually get destroyed starting the ending cutscene of the game.
The post Portal: Revolution – Chapter 8: The Remote Execution Walkthrough appeared first on Nintendo Smash: Video Games News, Reviews & Guides.

No responses yet