DOORS Paradox just came out, and it’s a real achievement. It possibly sets the standard for any other DOORS fanworks, and we’ve been playing and dying furiously since it came out. A lot of those hours and deaths have been in service of this, our massive Roblox DOORS Paradox walkthrough. This complete guide has everything. Every entity, every item, every boss, every ending.
Roblox DOORS Paradox Complete Guide
The aim here to give you all the information needed. We’ve divided it up into sections.
The Basics
DOORS Paradox is a fan game that gives you an alternate timeline starting at the end of The Mines, when Queen Grumble is attacked by Seek. Just as this takes place, a strange green-white energy manifests, dragging Seek, Queen Grumble, and the player characters into a rift. In this new reality, you’ll find yourself in an unfamiliar location, The Lab. DOORS Paradox plays quite a lot like DOORS… you’re probably not surprised about that. You’ll face another scary location, and entities that want to trick you, eat you, or throw you out of lockers. (More on that one later.)
Controls
Controls are pretty much identical to DOORS
WASD – MoveE – InteractCTRL – CrouchSpace – Jump (Only in chase sections.)Number Keys – Hotbar Items
You will run automatically during chase sequences.
Gameplay
Your objective is to escape the clutches of whatever force brought you here by advancing through the uh… doors. Each is numbered. You want to go through the next door in the numbered sequence, 0001, 0002 etc. The rooms are partly procedural and so they may manifest a little different each time. The spooky things inside them may be different, too. As far as what sets Paradox apart from regular DOORS, we’d say that it’s more platformer, more parkour. You interact with different height levels a bit, and some rooms can be a little more complex, like using vents to cross through blocked areas.
Stages
Paradox takes place over a number of locations. They’re a bit more closely spaced than the segments of DOORs, but that means there’s a lot of content…. and danger. This section of our Roblox DOORS Paradox walkthrough covers what to expect.
The Lab
This is the first stage in Paradox, where you touch down after the green entity (also known as Misleading Light) drops you down. This is a murky, seemingly abandoned facility full of beakers, vials, and glowing test tubes, as well as an assortment of strange entities. The boss at the end of the section is Verde.
The Sewers
After the Verde chase you’ll fall down into The Sewers. This is a pretty short segment. Go through about 10 rooms and the Curious Light will appear and teleport you back up.
The Lab Part II
You emerge in a different part of The Lab. Progress a little way in, and you’ll run into X-15.
The Dark Caves
This place is dark, extremely dark. The glowing crystals on the walls form the only reliable light source, and the Unknown Entity keeps cycling through, make sure you know where the nearest locker is. Maybe if you follow the Unknown Entity’s path, you might escape this maze.
The True Lab
Lab, but even… Lab-ier. This area comes with some extra entities. You’ll also run into Viola, who will accompany you some of the way while searching for something to help Verde, and drop some lore in the process. You’ll need to escape both Terminus and XR-20 to leave here in one piece.
?????
Reality is collapsing and different bits of different levels are roughly jammed into each other. Now you need to face the Misleading Light once and for all.
Entities
Paradox introduced a new bunch of monsters to replace the regular Doors lineup. Some of these are pretty similar to DOORS entities, and we’ll include comparisons where they’re appropriate for you veterans. This section covers anything we believe to be recurring entities, that is ones you may run into procedurally rather than in scripted segments.
Cue
Cue is similar to the DOORS entity Rush, but with a sneaky extra feature. Like Rush, you’ll get a clue when Cue is coming, a rumbling and shaking, as well as a red light approaching. You’ll need to jump into a nearby locker to wait it out. When Cue speeds past, you can leave the locker… but be very careful. Cue leaves behind a red vapour trail. Standing in it will drain your health quickly. Avoid the red patches in the air, they should fade after a short time.
Deliria
Deliria is DOORS Paradox’s version of Hide. She will show up to stop you cowering inside of lockers for too long. Unlike Hide, who lurks inside the lockers, Deliria arrives outside. You can see her figure move in front of the door. At this point, if you leave the locker, she’ll disappear. If you stubbornly refuse to leave though, Deliria will drag you out by force, taking a chunk of your health in the process. At least now you can… wait… where’d she go?
Ghoul
Ghoul resembles a creepy hovering specter with no legs and what appears to be a TV for a head. You should see Ghoul on entering a room. In order to pass Ghoul, you need to crouch to move past. It doesn’t matter if you are in the entity’s theoretical line of sight, it’s the noise of your footsteps that trigger hostility from it. Just creep around and you’ll be fine.
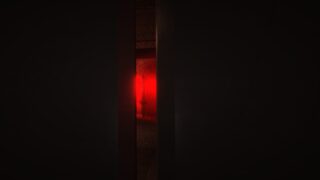
Glare
We lost so much health getting this screenshot.
Glare is a bit like the DOORS entity, Eyes, but more aggressive. Like Eyes, looking directly at Glare deals damage. Unlike Eyes, Glare will actively move around, making it harder to keep it out of your line of sight.
Route
Route is relatively straightforward, acting as Paradox’s version of Rush. You’ll hear a distorted, static-like noise getting closer. When it happens, you need to hide in a locker before Route tears through the area, or it’s the end of your run.
Scope
For Scope we’d say Grace’s Dozer is the easiest comparison. When you enter a room where Scope is active, at certain points you’ll see an eye appear on your screen. When this appears, you need to stand still until it goes away. This may happen several times inside a room. You have to be patient an move slowly, especially if this happens in a more complicated room that you can’t just stroll right through.
Shiver
Shiver isn’t as much an enemy as a situation. If Shiver is in a room, the place appears covered in blue fog. It’s also extremely cold, which is the main issue. Standing in the fog too long costs you health. You can leave the room to warm up again, so just take things slow and don’t get greedy with your time.
Shocker
Another thing that’s not so much a monster are… maybe just really bad wiring. Shocker appears to be an overhead light surrounded by a halo of sparks. If you get too close, your vision will start crackling, and you may take damage. You need to move through while keeping your distance from the affected light.
Unknown Entity
This is another Rush-A-Like, found in The Caves. This one’s tell is shaking ground and a strange wailing sound. This one also brings another danger, as the tremor it creates causes debris to fall from the cave ceiling, so watch your head. Again, you need to find a locker to evade this one.
Bosses And One-Time Encounters
We’ve abandoned the alphabetical format here to put these in chronological order as it seems to make more sense. This part of the Roblox DOORS Paradox walkthrough is every enemy that’s not part of the procedural random events. So, bosses and minibosses. We’ll explain how to handle each one.
Verde – Room 25
This guy shows up at the end of The Labs, looks suspiciously like the guy in The Shop, and while he’s missing half his face, he doesn’t look too hostile… until the Misleading Light starts influencing him. After that he’ll chase you through the facility.
Rather than a ‘boss’ in the traditional sense it’s more a parkour-heavy version of the Seek Chase segments in the original DOORS. There are fewer branching paths to get stuck in, but some routs require jumping over platforms, sliding under boxes, and generally executing tricky maneuverers under a lot of pressure.
The upside is if you can crack this one, you’ll understand the rough formula for a lot of the bosses.
EX-15 – Room 50
The boss of The Sewers, (kinda, you’re technically out of The Sewers when you see it.) EX-15 rather than a straight chase, is a cat-and-mouse segment. We’ll give you a wild guess which one you are. When EX-15 first spawns, you need to follow the Curious Light (the gold glow) and run into the next room. The light will seal the door for you, giving you a temporary safe room. Pick up the axe in this room. The doors will them open up.
To escape EX-15 you need to bring several parts, and fuel, to a truck parked up in one of the larger rooms. You’ll find parts for the truck inside wooden crates that you must smash with the axe. EX-15 patrols around the area, looking for you. It can’t go through the little vent doors, so use these to escape sticky situations.
Also, beware of the security cameras here. If you step into the red light, EX-15 will immediately begin to move to that location. (You can use this to your advantage to kite it away from things like the truck, especially if you’re working as a team.)
When you have all the parts, you need to add them to the truck, and go through the refuelling process that feels like it takes 3-5 business days.
After that, you fire up the truck and a chase begins, drive it through the tunnels for a short distance until a rockfall takes out EX-15… and also, sadly, the truck. Good night, sweet prince.
Unit 7
More of a miniboss than a boss boss, you’ll find this robot in a section in the True Labs. The Misleading Light will split you and Viola up, so you’ll need to progress on your own. Unit 7 moves around the darkened area.
While it its moving, it’s lit up in red. While searching, it lights up green. If you enter its line of sight while it’s great, it will shoot you and do damage.
To escape the area, you need the access code, written on a whiteboard somewhere in the area. Once you have the code, enter it into the console at the far end of the room to move forward.
Terminus
Shortly after you escape Unit 7, it will pursue you into the hallway, only to get crushed by Terminus, the unholy fusion of a spider and a semi truck that wants to run you down.
This is another chase sequence, but a little trickier that Verde. You need to pick which doors are the numbered doors to avoid running into a dead end.
Vitamins can help make the run a little bit easier by increasing your speed, but it comes down more to how fast you can spot the right door. This is definitely one of the tougher segments.
EX-20
You’ll run into an upgraded version of EX-15 at the end of the True Labs. As you might expect, it’s kind of similar to the EX-15 boss in what you need to do, just noticeably tougher. You need to sneak around the lab area and avoid the giant robot, while activating four computers scattered around the rooms.
When you activate a computer, it will start a minigame where and arrow travels around a ring, and you need to tap when it’s in a highlighted section. Do that three times, and the computer is activated. EX-20 patrols looking for you, and like EX-15, if any security camera sees you, it will move to that location.
EX-20 also has some small robot minions that lurk near the terminals. If you can sneak behind them, you can hit a switch on their back to disable them.
Misleading Light
The final boss is Misleading Light, the green energy that brought you here in the first place, and it’s going to throw everything at you. The boss is divided into several different stages, and you should be ready to hit the ground running in each of them.
Section 1 – The Rift
This is a short parkour segment. You need to hop across the floating island and head for the big green triangle rift. Misleading Light will float after you, conjuring spike out of the ground, be ready to get out of the way before they manifest.
Section 2 – Figure’s Library
Next, you’ll drop into the Library. This is a remake of the Figure boss fight from DOORS. If you’ve played that before you should know exactly what to do, but in short:
Find the highlighted books around the Library while avoiding Figure. Figure cannot see you, but can hear well, so you need to sneak.The books should give you one number and one shape each. You need five of them.Find a piece of paper on the desk. It will show you the order you need to enter the numbers in, by looking at how the shapes are ordered on the paper.Make your way to the far end of the library, there should be a combination lock there.Enter the number code using the book clues and the paper to guide you.
Section 3 – Grumble’s Nest
Like Figure’s Library, this is another flashback to a DOORS boss, in this case it’s Grumble. Another quick rundown of the mechanics in case you’re not sure.
You need to find three terminals hidden around the nest, A, B, and C. You’ll get a numbered code for each appear on the left side of your screen, along with the letter for the terminal you need to find.When you find the right terminal, enter the number code and hit the switch to activate it.When they’re all active head to the main terminal in the starting room and interact to activate the bridge.Run across the bridge, away from Grumble.
Section 4 – Seek Chase
One last chase, and it’s a big one. When you drop into the next area you’ll see Viola… but something is wrong. Oh, that’s not Viola at all.
Next comes a classic Seek chase. You will need to run, and jump over large gaps as reality begins to collapse. It will take you through The Hotel, The Outdoors, The Mines’ minecart chase, and the Paradox facility before the final rift.
Section 5 – The End
If you can stay alive through all these sections, you can finally deal the finishing blow to the Misleading Light. Congratulations.
Items And The Shop
If you hunt around in lockers and drawers, you might find a few items left behind that could come in useful.
Item List
Amethyst – These purple crystals are the game’s currency. Stock up to use them in The Shop. (See below.)Lighter – The weakest lightsource, only lights up a small area around you.Flashlight – Lights up a beam in front of you, average light source.Blocklight – Lights up a large area in front of you, best lightsource right now.Battery – Refreshes the power in whatever light item you have equipped when you interact with it.Bandaid – Restores some of your health.Keycard – Needed to open a sealed door.Starlight Dagger – Found in The Sewers. You can use this to take down one regular entity.
The Shop
You’ll first run into The Shop in The Lab. It’s run by a couple of odd-looking creatures, Viola who handles the front desk and the much less sociable Verde who loiters in a corner looking uncomfortable. If you look on the counter you’ll find a selection of items for sale, in exchange for Amethysts.
You can but the following items.
Flashlight – 250 AmethystBlocklight – 400 AmethystLighterVitamins
Easter Egg: If you wait long enough in The Shop, Viola will open the door next to the counter and walk out for a short time. This lets you explore the staff area. Here you’ll find Verde’s untidy wreck of a room, Viola’s Room (with a secret S.T.E.L.L.A keycard under the bed) and a secret third room that’s been crossed out. Odd.
Endings
There are two possible endings right now. Good and bad. We can explain both.
Good Ending
This is the ending you should get by going through the game more or less as normal.
After EX-20, run ton the elevator to escape the facility.You’ll be dragged into a rift by Misleading Light.Complete the Misleading Light boss fight. (Detailed above.)If you win, you’ll be transported back to the entrance of The Castle.Viola and Verde will appear, and thank you for your help before they return to their own reality. You saved them, and yourself.
Bad Ending
This is actually the harder ending to get, as you need to go out of your way to do something. To get this, you need to do the following specific steps
Take the S.T.E.L.L.A keycard from under Viola’s bed by waiting for the area behind the counter in The Shop to open up. (If you’re in multiplayer, the group have to all vote to do this, as it locks you in.)When powering up the True Lab, pick the ‘System Hazard’ activation option, using the keycard.In the EX-20 encounter, after activating the last computer, you need to find the cooling system valse and turn it all the way down. This will cause the facility to enter its self destruct sequence.When it blows, your death screen will turn to the Misleading Light, congratulating you on your achievements, and you’ll get a heartbreaking cutscene about the fate of Verde and Viola. You monster.
Really hope you liked this Roblox DOORS Paradox walkthrough. It was a lot of time in the making, but very fun to put together. Paradox is a great game, and a worthy tribute to DOORs, so we hope this helps you get a lot out of the game. Speaking of DOORS, you might also enjoy editor Adele’s speculations on what’s in store in Floor 3.
The post Roblox DOORS Paradox Walkthrough – The Complete Guide appeared first on Gamezebo.
No responses yet