This guide will walk you through chapter five of The Casting of Frank Stone.
Chapter 5: The Phantom of Cedar Steel – Walkthrough
You play Jaime initially in Chapter Five and will switch among Jaime, Chris, and Linda as the chapter progresses. During the initial conversation, select the following dialogue choices.
Excited – Right on time!
Uneasy – Stone’s victims were real people.
Approving – You’re right.
Once you have control, go over beside Robert and Chris to find the Old Newspaper Article. Interact with both articles to get The Champion (artifact). Now, go towards the door on the left side and interact with the Oracle of the Omniverse book on the washing machine. It will give you the Murder Mill (artifact).
After looking around the garage, speak with Linda and select the following dialogue choices.
Concerned – Her obsession with Frank Stone is intense.
Encouraging – It’s pretty rad.
Watch the cutscene and you will be switched to Chris.
Find the entrance to the storm drain
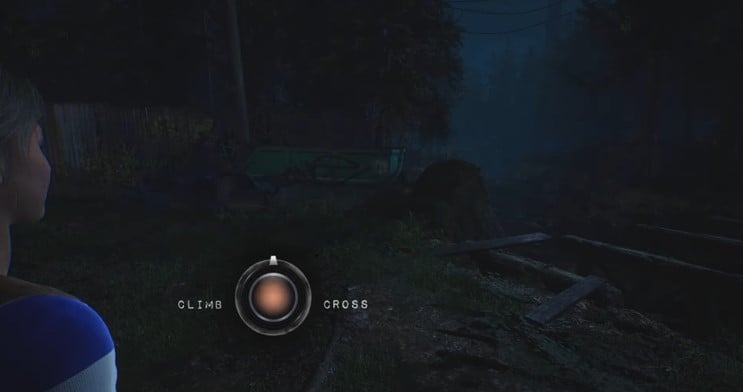
Once you have control of Chris, squeeze through the rocks and jump over the log to group up with everyone. Here, you will get to make a decision on the route you want to take to get inside the mill. We decided to continue on the Cross route, but selecting the climb wasn’t that bad either. Moreover, both of these routes contain one trinket (collectible) along the way to the mill.
Upon choosing the Climb route, continue along the path until you come across a gap between the rocks on the left side. Squeeze through the gap to find the Mother Daughter Ring (Trinket – collectible).
If you have decided on the Cross route, continue following Robert on the path. Press the button prompted on the screen to chat with the group and keep following the path until you reach a ledge. Use the movement keys to balance on the ledge and cross it. After crossing the ledge, Robert will jump down, but there is a trinket on the platform ahead that you can reach by crossing over another ledge.
Cross the ledge and interact with the box to get the Tattooed Middle Finger (Trinket – collectible). Drop down from the platform and go under the log ahead. Jump on the platform ahead to cross over the cabin and then follow the path to reach the outer edge of the mill.
Find a way into the mill
Continue along the tunnel until you cross through a door and see another path on the left side. Squeeze through the wall to find The Wraith (Rellik – collectible). Now, go back and start following Robert until you come across a broken window on the right. Jump through the window and open the door ahead. Go to the table on the right side to find the Casting Shed Key.
Go back to reunite with the group and start following Robert again. Press the prompted button on the screen to keep chatting with Robert and you will eventually reach the ladder. Interact with it to climb up which will initiate a cutscene.
After the cutscene, you will switch to Linda and during the conversation with the group, select the following dialogue choices.
Insistent – We still have one more scene.
Relaxed – I don’t care if she tags along.
Find the door to the Furnace Chamber
Once you have control of Linda, instead of heading towards the door to the Furnace Chamber, turn around and go to the left side to reach the grate where Sam Green goes down in the first chapter of the game. Here, you will find the crowbar on the ground. Pick up the crowbar and go to the open area on the side. Reach the double door on the left side and interact with it to use the crowbar to open it. Inside, you will find the Wooden Oni Mask (Trinket – collectible).
Now, head back to the original starting location and reunite with the group. Interact with the door to open it and reach the Furnace Chamber.
Find a place to shoot
Go along the ramp in the furnace chamber and you will see a movable bridge on the right with a trinket box on it. You cannot jump on it, and if you go to the right side, you will see the console to move the bridge but it will be missing a crank handle. Go down to the ramp and go to the right side past the group. Head up the few steps of a staircase and turn to the right to see a gap between the pipes.
Squeeze through the pipes to find the crank handle on the ground. Pick up the crank handle and go back up to the console on the ramp. Interact with the console to rotate the handle and move the bridge. Now, interact with the trinket box to get the Blighted Rat (Trinket – collectible). Once done, speak to Chris in the group to start shooting.
Watch the cutscene and then select the following dialogue choices.
Approving – Jaime, it was perfect.
Casual – Wanna come outside, Bonnie?
After the conversation, you will switch to Chris and get to use the camera. Move the camera to the position of the green substance and then focus on it. Watch a brief cutscene ahead to get control of Chris.
Search for the entrance to the machine shop
After getting control, go to the right side and follow the path through the doorway to reach a broken wall. Cross ahead through the wall to find The Clown (Rellik – Collectible). Now, go back and make your way to the door with the lock and interact with it. Use the Casting Shed key to unlock the door and go ahead. Go to the left side to find the movable steel platforms. Move the two steel platforms out to make a pathway for the ramp above.
Walk over to the movable Red Box in the room and interact with it. Move it under the ramp above with the yellow sheet. Climb on the box and then onto the ramp. Continue along the ramp to squeeze through the gap to reach a ledge. Balance along the ledge to cross ahead and then jump on the steel platforms that you moved to reach a trinket box ahead.
Interact with the box to find The Iridescent Head (Trinket – collectible). Now, interact with the ladder ahead to lower it and go down where Jaime and Robert are. Once done with the exploration, go through the doorway on the right and you will reach the door to the Machine Shop.
Look for a way up to the train
After a brief cutscene, you will switch to Jaime. Continue ahead to come across a locked powered gate. Interact with the window ahead to see a key in the key holders on the other side. Loop around the train to find Robert near a generator. While speaking with Robert, select the Impatient: I want a few minutes alone with Chris, dialogue option.
Find parts to repair the generator
There will be two parts that you need to fix the generator. For the first part, go near Robert and there will be a table with a Caution and a Danger sign on the wall. Interact with the table to pick up a ‘bolt’. For the second part, go to the other side where Chris is and there will be another table beside the Danger sign on the wall. Pick up the second part from the table and then go back to the generator.
Interact with the generator to start repairing it and there will be several QTEs that you need to perform to install both parts. Press the prompted button on the screen when the red line reaches the white bar to install the parts quickly.
Open the powered door
Once the generator has been fixed, go to the powered door and interact with it. Press the red switch to open the door.
Find a way into the office
The office door will be locked where you saw the key earlier through the window. There will be a vent on the opposite side of the office through which you can go through. Move the red box in the room underneath the vent and then climb to make your way down to the office. Once there, interact with the key to pick it up.
Leave the office to show the key to Chris. Now, go to the boxcar on the train and unlock it using the key.
Make your way up to the train
Go through the boxcar to come out on the other side and then climb the ladder. Make your way to the ramp and then follow it to reach the train. Here, select the Commanding: I’ll go first, dialogue choice. As Jaime and Chris make the jump to the train, be ready to catch Robert by passing the QTE when he jumps.
Explore the lair
After the cutscene, interact with the notebook on the middle table to get The Champion (artifact). Now, go to the shelf ahead to interact with the Jar and then clean the dirt on it to initiate a cutscene. Once you have watched the cutscene, interact with the hatch to drop down and you will get to conversate with Chris. During the conversation, select the following dialogue choices.
Apprehensive – Is moving that such a good idea?
Appreciative – Ok… sure.
A major cutscene will start ahead in which the spirit of Frank Stone will come alive. Here, you will get to choose between a major choice – Confront or Flee.
NOTE: If you choose Confront and you don’t have Fireworks on Jaime which he gets from Chapter Three by selecting the Drug Store spot first, he will die. However, if you have Fireworks, Jaime will use them on the spirit, but it will not make any difference and Jaime will run out.
Choosing the Flee option will make him simply run away. In both cases, Chris will get pulled into the portal which concludes Chapter Five of The Casting of Frank Stone.
The post The Casting of Frank Stone – Chapter 5: The Phantom of Cedar Steel Walkthrough appeared first on Nintendo Smash: Video Games News, Reviews & Guides.
No responses yet