Venturing into a dark cave underneath the lake to find the Hiddenfolk will put Senua against several hurdles that she must overcome to find her way out and learn how to defeat the giants to stop the sacrifices. Chapter 4, Huldufólk includes several puzzles based on light and braziers that players solve to find a way out of the cave.
This guide will help you walk through each puzzle in Chapter 4 of Senua’s Saga: Hellblade II.
All Puzzles in Chapter 4 of Senua’s Saga: Hellblade II
Almost all the puzzles in Chapter 4 revolve around turquoise mist and braziers. The turquoise mist shows the possible hidden path that can be opened and closed by lighting or extinguishing the brazier. Moreover, the areas will have other obstacles as well that you will have to work around to solve the puzzles.
First Puzzle – Solution
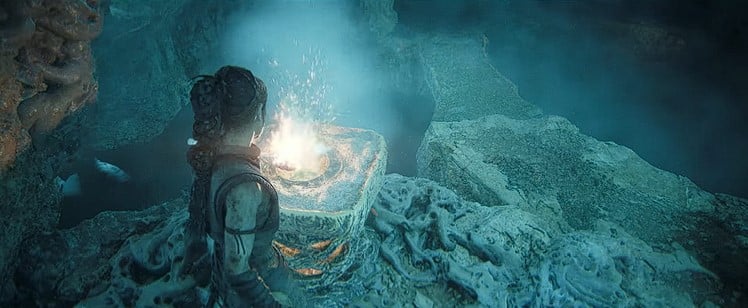
Players will encounter the first puzzle early in the cave as they enter an area with turquoise mist. Head to the left side to go up and climb the ledge to find a brazier. Interact with it to light a turquoise fire and a path in the front will appear. Drop down and go up the appeared path to continue toward the next tunnel.
Second Puzzle – Solution
After solving the first puzzle, the second brazier is not far ahead. Drop down and turn right to go along the path to reach the brazier. Interact with it to extinguish the fire and a door will open below. Go back to the path and then toward the opened door.
Third Puzzle – Solution
The third puzzle area is reached after traversing through the water in the cave. Climb the ledge on the right and go to the back side to squeeze through the rocks to reach the brazier above. Light the brazier to show a ramp ahead. Drop down and go over the ramp to light a fire ahead.
Now, go back and extinguish the flame on the brazier to remove the ramp and go under the falling water to the other side. Climb the ledge to reach the lit fire, interact with it to light the torch, and then go to the other brazier to light it and show a bridge ahead. Cross the bridge to continue ahead.
Fourth Puzzle – Solution
After solving the third puzzle, continue on the path ahead to find another lit brazier. Drop down into the water and go ahead to find a ledge to climb on and reach the brazier. Interact with it to extinguish the flame and then drop back into the water to go through the appeared path.
Climb the ledge ahead and then turn to the left side to go through the waterfall which will extinguish the torch. Now, go to the left side and hug the wall to get across to the other side and you will find a fire through which you can light the torch. Go ahead and drop down to reach the lake again. Drop down into the water and cross it to the other side.
Fifth Puzzle – Solution
After the fourth puzzle, continue ahead to see several lit fires at a certain distance. For now, go to the left side to go through another waterfall and you will see a light above. Go to the path on the right to see a ledge ahead and just before the ledge if you turn left, you will find a small entrance leading to the fire. Reach the fire and interact with it to light the torch and then turn around to follow the path ahead to find another point to light the fire.
Once done, backtrack to the start of the path through the waterfall and you will see a path of light in the water. Stay in the lighted path and cross to the lit fire ahead. Interact with it to light the torch and then go into the water again to continue ahead.
Sixth Puzzle – Solution
Shortly after the light puzzle, you will come out of the cave where you have to find your way to the next entrance of the cave. Pick up the torch on the right side as you walk out of the cave. Walk up to the brazier ahead and light it with the torch to make a bridge on the right side. Cross the bridge and go ahead to find a lit brazier. Interact with it to extinguish it and clear the path ahead to reach another lit brazier, extinguish it as well.
Now, go back to the previous brazier and light it, and then go along the path ahead to find an opening in the middle to reach the second brazier. Light the second brazier as well to complete the path in the middle. Go up to the path and follow it to reach a familiar hole in the wall. Interact with it to place the torch in it.
A shadow on the other side will get the torch and light a brazier for you to cross to the other side. Drop down the ledge on the left side to cross the bridge and then extinguish the brazier that the shadow lit. A path will be revealed below, go through it to reach the hole in the wall and the shadow will return you the torch.
Grab the torch and backtrack to the brazier to light it again and then go up the path to light another brazier. Now, continue ahead to drop down from the ledge and then cross the bridge to reach the first brazier. Extinguish the brazier to see a path revealed ahead, go through it, and circle around to reach a hole in the wall. Interact with it to give the torch to the shadow. The Shadow will once again light the brazier for you to reach the next entrance to the cave.
Seventh Puzzle – Solution
Upon surviving the dark cave, you will reach a big room with bubbles that can change the world upside-down. You need to find your way to the tunnel by focusing on the bubbles to clear the path. Go on the path on the left side and focus on the bubble beside the rock. Look in the middle to focus on the bubble for the brazier.
Continue along the path on the left side until you reach the rocks blocking the path ahead. Look towards the brazier and focus on the bubble again to clear the path ahead. Push ahead on the path and then focus on the brazier bubble again to reach the final bubble ahead. Focus on the final bubble to bring the tunnel down.
Go back and drop down the ledge to go to the other path. Focus on the brazier bubble again to open the path and then continue along the path until you reach the gap. Focus on the brazier bubble again to fill the gap and you will reach the tunnel.
The post Senua’s Saga: Hellblade II – All Puzzles in Chapter 4 Guide appeared first on Nintendo Smash: Video Games News, Reviews & Guides.
No responses yet