This guide will walk you through the third chapter, Rauðhólar of Senua’s Saga: Hellblade II.
Chapter 3: Rauðhólar – Walkthrough
As the chapter begins, follow Thorgestr and Fargrímr downhill and on to the destroyed settlement. Listen to the conversation between them and then start following them again. Upon reaching the next corner, a cutscene will begin in which Illtauga begin to chase us. Run along the path ahead crossing the broken huts and lava to reach the end of the path where another cutscene will begin.
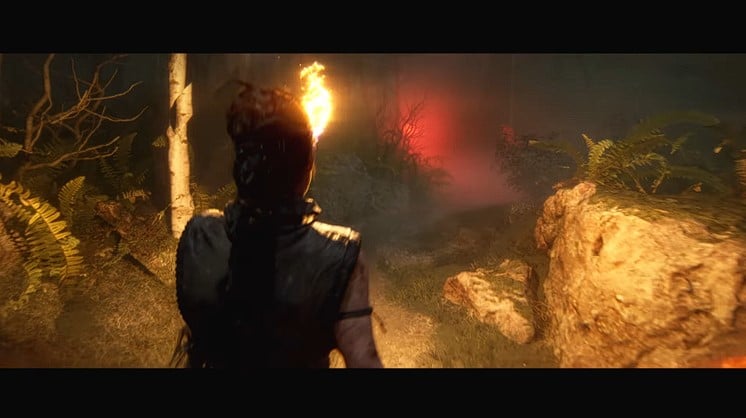
After the cutscene, you will be in a dark forest. Go along the path ahead to come across a blocked path (Shadow). Turn right from here and continue ahead to find a torch. Interact with the torch to pick it up and then go back to remove the shadow. Continue ahead and you will see three different paths. Both the Right and Left paths will have a red light at the end, making you start again from the first shadow area so, go through the path in the middle.
Drop down from the ledge and a fight sequence will begin against the shadow enemies. Dodge their attacks to get a few quick hits in and once the focus is charged, use it to finish them. After defeating all the enemies, pick up the torch and you will see the shadow paths again. Go close to the paths to see if it has the glowing red light or not to choose the right path.
Continue through the path where there is no light and squeeze through the rocks ahead. The torch will go out so run ahead to find a lit brazier. Interact with it to light the torch and another fight sequence will begin. Same as the last time, dodge the attacks to play safe and once the focus is charged, use it to defeat the enemies.
Once all the enemies have been defeated, pick up the light and look for the right path, the one with no red light. Follow the path to the end to light a sacrificial site which will begin a cutscene.
After the cutscene, go downhill and drop down a couple of ledges to follow the path ahead to reach a puddle of water. Turn left from here and continue ahead on the path to see a pedestal in the middle of a circled area. Go to the path on the left side to find a ball. Upon picking up the ball, the world will change upside-down. Head back and place the ball on the pedestal and it will reveal sprinkles of water in the air.
Go close to them and focus on them to remove the stones ahead and place them up. Continue ahead and climb the ledge on the right to find the second ball. Now, bring it back to the pedestal to complete the puzzle and open the blocked path ahead.
Go through the opened path ahead and follow the path to come across a small tunnel on the right. Continue towards it to crouch through the tunnel and you will see another pedestal ahead. Make your way to the path on the right side to go up and find the first ball. Bring it to the pedestal to reveal the focus points for the bubbles.
Go straight from the pedestal and focus on the bubble ahead to revert the landscape. Climb the ledge to go up and then focus on the bubble again to bring the ball down. Pick up the ball and then focus on the bubble last time to get down. Bring the second bubble to the pedestal and then go toward where you found the first ball to see another focus point.
Focus on the bubble to bring the bridge down and then go up the path to cross the bridge. Focus on the bubble ahead to bring the ball down and then cross the bridge again and back down the path. Focus on the bubble again to remove the bridge to get the last ball. Bring the final ball to the pedestal to open the blocked path.
Go through the opened path and follow the path to climb down a couple of ledges and then continue along the puddle of water. As you reach the end of the path, there will be a drop on the left side. Drop down and continue ahead to find another pedestal.
The first ball is on the right side of the lake so go ahead and pick up the ball to change the world and then place it on the pedestal. As the water appears in the air, focus on it to bring down the landscape with the second ball. Go up the path and pick up the second ball to bring it to the pedestal.
Focus on the new bubble point to bring down the landscape with the third ball. To reach the third ball, you will first have to create a path from the left side. Go to the left side and focus on the bubble along the way. Now, go and climb the ledge to focus on another bubble. Doing so will trigger a fight sequence against Draugar. Defeat the enemies and then go back down to focus on the bubble in the middle again to complete the path.
Now, go to the start of the path and go along it to pick up the third ball. Bring the final ball to the pedestal to complete the puzzle and the lake in front of you will begin to empty. Go along the revealed path inside the lake area and pick up the torch to enter the hole ahead. It will initiate a cutscene which will conclude the third chapter of Senua’s Saga: Hellblade II.
The post Senua’s Saga: Hellblade II – Chapter 3 Walkthrough appeared first on Nintendo Smash: Video Games News, Reviews & Guides.
No responses yet